
Conclusion
When a label feeder jams, don’t rush to change the feeding parameters first. In most cases, the adjustable parts along the threading path are not in place—reel limit, guide width, pressing plate height, discharge table slider and material clamping lever, peeling blade direction, and waste recovery. Going through these six points in order is faster than repeatedly trying parameters.
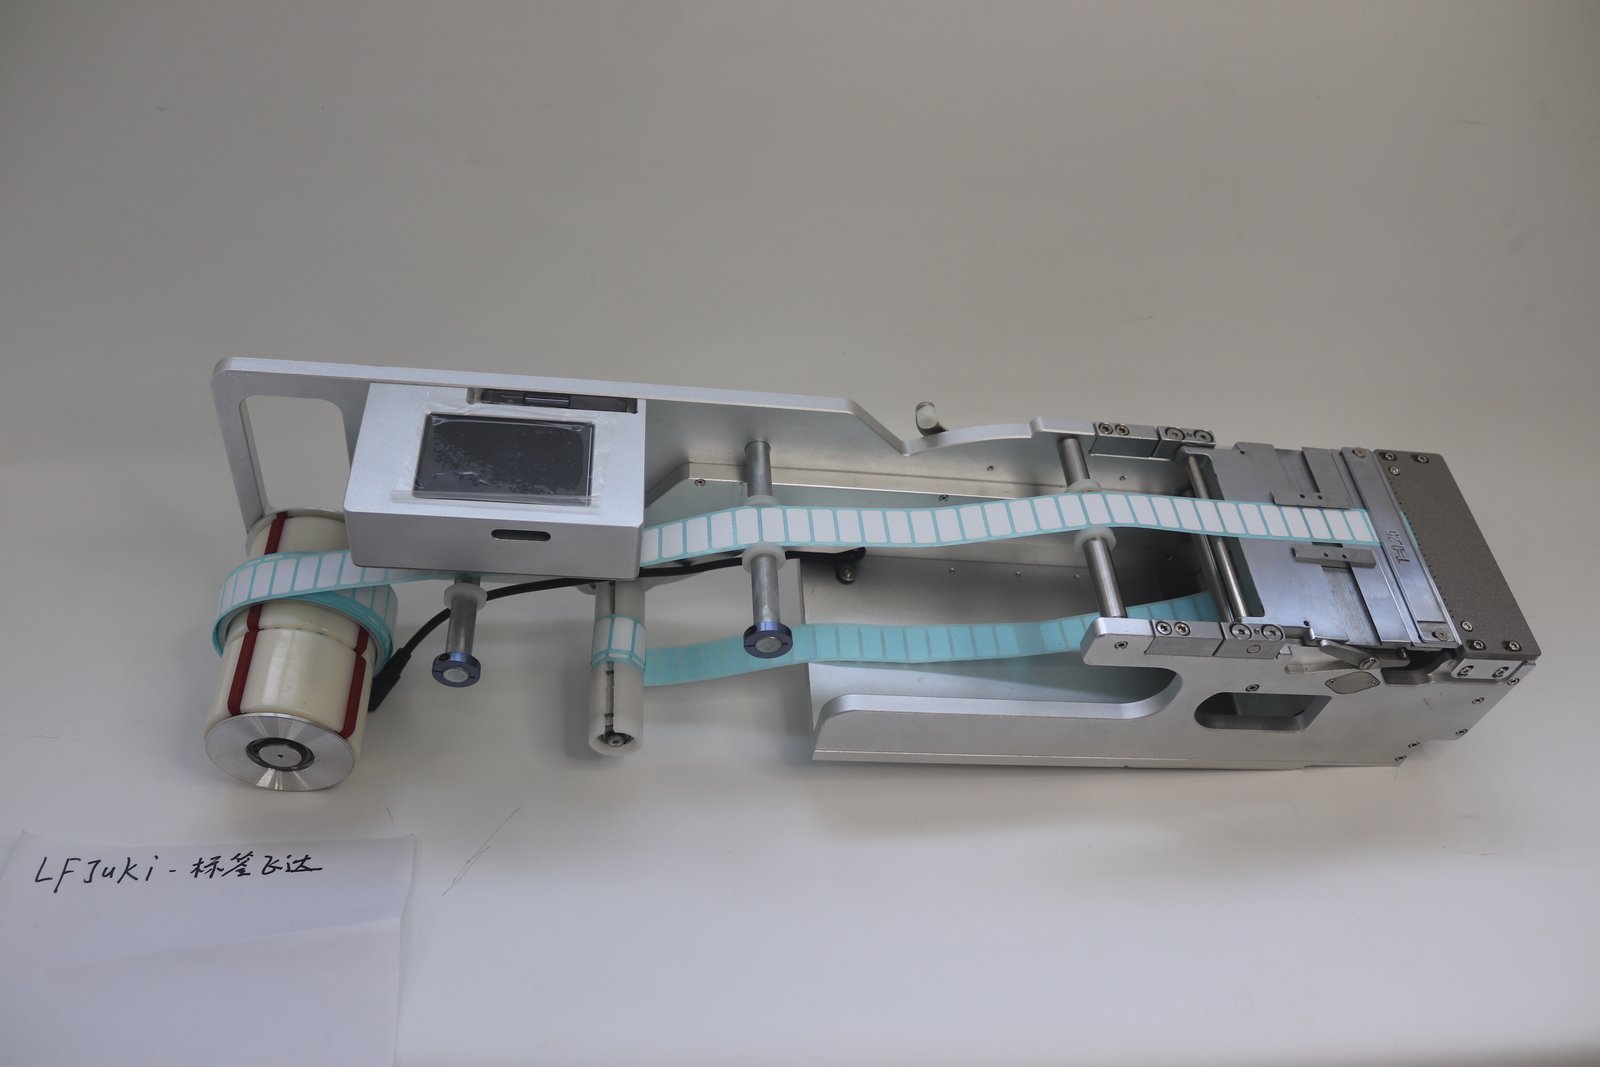
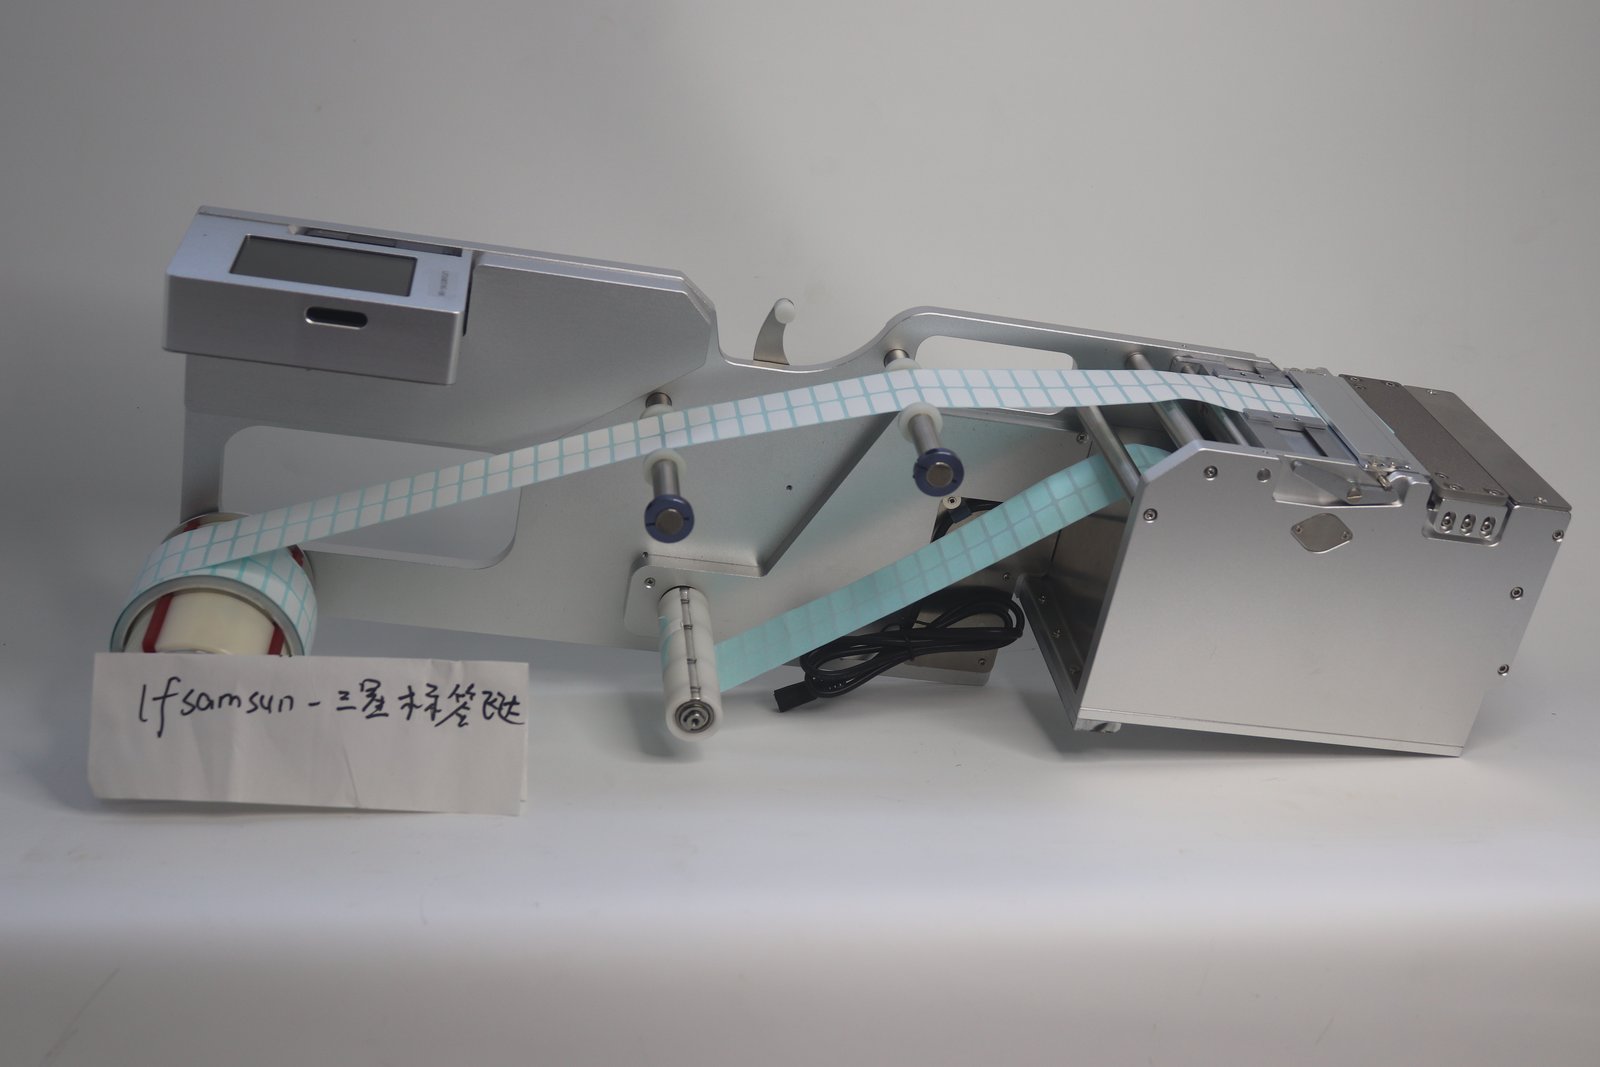
Below is the common approach from several manuals of BestFeeder label feeders LFSID-100 (upper-screen model), LFJUKI-32, and LFSUMSUNG-60. The threading structure is basically the same, though the adjustment positions differ slightly on some models, which are noted point by point in this article.
First Distinguish: Jamming or Inaccurate Feeding
Jamming means the material strip no longer advances, the motor runs idle, or the material strip is pulled taut. Inaccurate feeding means the strip is still moving, but the label stop position is off—that belongs to the matching problem of the three parameters: feeding position, feeding speed, and feeding delay. Handle it separately from jamming, and do not adjust them together.
Six Adjustable Parts, Check in Order
1. Reel Limit Ring
The reel is mounted on the label mounting shaft sleeve and passes through the winding shaft for material feeding. The limit ring must be used to limit the reel and prevent left-right swaying. If the reel shifts left and right, the material strip enters the guide section at an angle, and when the angle becomes too large, it jams.
2. Guide Width Slider
Use an Allen wrench to loosen the screws on the surface (on some models they are on the inner side), and move the guide block to the appropriate position according to the reel width. If the guide block is too wide, the material strip sways left and right; if too narrow, the edges of the material strip are pinched. After changing the reel width, this item must be adjusted accordingly.
3. Pressing Plate Height
The pressing plate can be loosened or tightened with four set screws, and the height is adjusted according to label thickness. If pressed too tightly, the material strip has high resistance; if too loose, the material strip deviates.
4. Discharge Table Slider and Material Clamping Lever
When threading, pull the discharge table slider outward to leave a threading gap; the reel is clamped between the driven shaft and the driving shaft, and the material clamping lever is tightened inward. If not clamped tightly, the material strip cannot move or slips; if the slider does not return to position, the gap remains open. The upper-screen model LFSID-100 uses a pressing cover: press the pressing cover lever down to open, clamp the reel between the pressing cover and the driving shaft, then press down to tighten.
5. Peeling Blade Direction
For small labels that are difficult to peel, the peeling blade can be turned to the other direction, using the side with a smaller angle. If the direction is wrong, the label is not peeled cleanly and will be carried into the waste roll, which also looks like jamming.
6. Waste Recovery
The empty reel is recovered through the waste strip recovery shaft sleeve. If the waste roll is not tightened and the shaft sleeve slips, the accumulated waste will drag the material strip in reverse.
Incorrect Fiber Setting Value Can Look Like Jamming
The fiber amplifier generates a sensing value when the label passes the fiber point. When the working setting value is greater than the sensing value and the light is on, it is judged as material detected; when the working setting value is less than the sensing value, it is judged as no material. The practical approach given in the manual is: the working setting value should be 200 greater than the sensing value in the no-material state. If the setting value is off, the feeder may judge material as no material (empty feeding), or the opposite. Label light transmittance varies, so after changing to a different label, it is recommended to recheck once.
Material Feeding Angle and Early Peeling
The angle direction of the material strip should remain straight. For large labels or labels that fall off easily, the spring winding shaft can be bypassed to avoid excessive angle causing early label peeling—early peeling not only loses labels but also causes residual adhesive to be carried onto the waste roll.
Daily Maintenance
- Wipe with a dry, soft cloth that does not contain volatile substances;
- Avoid directly exposing the feeder to sunlight and other heat sources;
- Working voltage 24 V, current must be greater than 2 A, avoid sharing the same power plug with high-power electrical equipment;
- Avoid contact with or exposure to solvents, acids and alkalis, water immersion, or humid environments;
- The peeling blade and material receiving platform should not be subjected to impact or contamination. Pay attention to collisions between feeders and between feeders and other objects.
Contact the Manufacturer in These Situations
The manual states that this product requires professional repair. The product has a one-year warranty from the date of purchase. During the warranty period, if the product does not work properly due to its own quality, it is covered by the warranty and no repair fee is charged; beyond the warranty period, or damage caused by incorrect and improper use, maintenance, or storage, is not covered by the warranty. Before shipment, the product parameters are adjusted according to the samples provided by the customer, and it can usually be used once connected to power; online remote guidance is available for operational questions, and the product only needs to be sent back if parts need to be replaced.
Further reading: Label Feeder Product Line, How to Adjust Feeding Position, Speed, and Delay.